August 26, 2013

I grew up eating salty, savory matthis by the bucketful. The best would be sitting down to some hot, steaming chai with my family when visiting Chandigarh and my massi (aunt) would pull out her large, plastic container with the red lid from the storage until set off from the kitchen.
I always loved stepping into this make shift pantry because it was built from bricks with the intention to keep things inside naturally cool without the need for electricity. Just walking into the kitchen in your bare feet had the same effect – a rush of soothing cool against the heat outside. And, matthi. At once flavorful, crunchy, and utterly satisfying.
A plateful, tangy lime chutney on the side, and a cup of chai was enough to make you long for tea time the next day..and now you can make your own.
xoxo Anupy
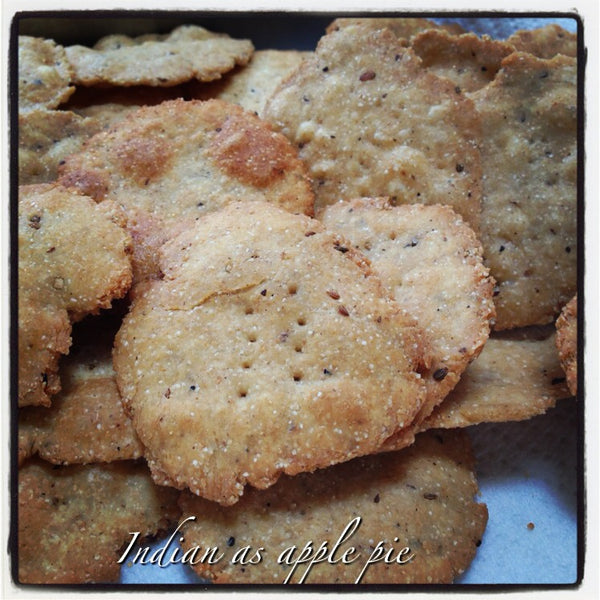
Matthi
Makes about 30
Tools: Food processor, kadhai, wok, or heavy pan for frying, mortar and pestle, rolling pin, and slotted spoon.
1 cup whole wheat chapati flour *
¼ cup coarse cream of wheat, sooji
½ teaspoon coarse sea salt
¼ teaspoon carom seeds, ajwain
½ teaspoon coarsely ground black pepper
2 ½ tablespoons oil (I use grapeseed)
3 tablespoons warm water
Oil for frying (I use grapeseed)
1. In a food processor, blend flour, cream of wheat, salt, carom, black pepper, and oil. You’ll have a coarse flour mixture. The coarser the black pepper, the better. I pound my peppercorn just a few times in a mortar and pestle.)


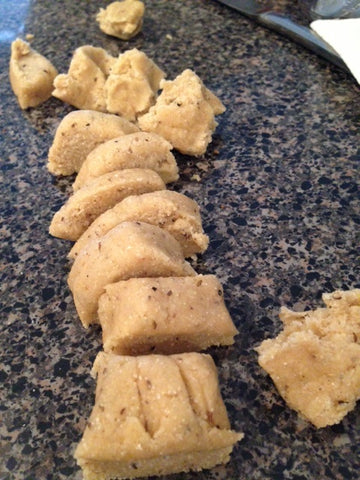
2. Slowly add water and blend again until all of your ingredient come together into a slightly coarse ball of flour and spices. This dough should be slightly hard and crumbly. You don’t want it to be too smooth or your end product will come together and be soft like a puri in the oil.

3. Pull off or cut off small pieces of the dough (about a tablespoon), and roll them in between the palms of your hands until smooth. Flatten each one and roll them out with a rolling pin until thin and smooth. They will crumble at the edges. That’s okay. Keep in mind, the thinner they are the crispier they will turn out later.


4. Take a fork and prick each one two or three times to make sure they don’t puff up when you fry them.

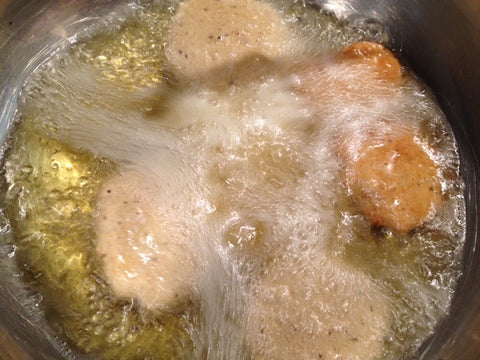
5. Heat oil in a kadhai or wok over medium-high heat. To check that the oil is ready, drop a pinch of dough into the hot oil. If it falls to the bottom, your oil is not hot enough. If it rises to the top immediately it is done and ready for your matthi. One tip on the oil: it should not be too hot. Once it gets hot enough, turn your heat to medium or medium-high and then fry your matthi. If it’s too hot, they tend to brown on the outside and not fully cook on the inside.
6. Carefully place your uncooked matthi into the oil, about 6 – 8 at a time, depending on the size of your pan. You don’t want to overcrowd them. Cook them about 4 minutes total, turning them over once or twice to be sure they brown evenly. Drain them with a slotted spoon and transfer to a pan lined with a paper towel to collect the extra oil.


7. Once you finish frying all the matthi, let them sit out until they are completely – absolutely – cool. This step is important to make sure they are crispy when you eat them. Once cooled, transfer to an airtight container for up to 2 weeks. Try eating these with a little lemon pickle (achaar) and with a cup of tea – amazingly addictive!
Try This! Instead of frying, try baking your matthi. Amazingly, they turn out even crispier and tastier – two friends who tried both preferred the baked ones. If baking, place them on a well-oiled pan (spray them with oil lightly across the top as well), and cook at 350 degrees for 20 – 25 minutes, until golden brown on the top rack. There’s no need to even flip them. Remove from the oven and place on a tray to cool.
* If you are not near an Indian grocer store, you can also use whole white wheat pastry flour. Keep in mind that most recipes and commercial takes on this dish use white flour (maida), but I wanted to only use whole wheat flour. Use white all-purpose flour if you prefer.
Comments will be approved before showing up.

